


woodkiln.org, shares the experiences of building and firing the Spring Valley Anagama, near San Jose, CA. The Spring Valley Anagama (SVA) is a 100 cubic foot anagama fired by a local community of potters. It was built by a small group on private land starting in 2000.
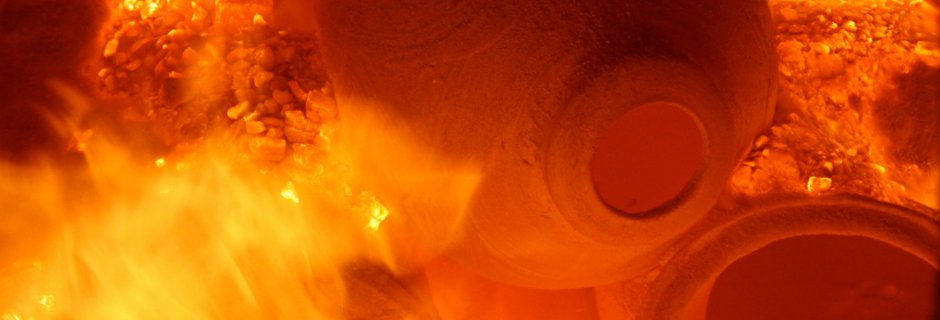
Anagama is Japanese for “hole kiln”. These types of kilns have been fired traditionally for thousands of years, being fired only with wood. The ash in the high temperature kiln (which peaks at 2450 deg F) create beautiful and natural effects on the clay body. In the case of the SVA, wood burned is typically scrap wood: off-cuts from a cabinet making factory and wood from felled trees that are not good for fireplaces. Cutting wood, preparing the kiln, loading, firing and unloading is incredibly hard work but it is well worth it. The results are exquisite. Each pot has its own story to tell with layer upon layer of melted ash, revealing subtle variations in color and texture.
There are many who helped build the kiln (as well as the other kilns on the site). The four “principals” who were primarily responsible for getting it built are Izzy Lewis, Phil Park, Jerry Hurst and Shawn Johnson.
The Spring Valley Anagama is a “sister kiln” to the Dancing Fire Kiln in Maru, Japan. Dancing Fire was designed by Masakazu Kusakabe, who generously shared his knowledge of kiln building and inspired the design of the SVA.
A great resource on wood firing is “Japanese Wood-fired Ceramics” by Marc Lancet and Masakazu Kusakabe.
Be sure to check Woodkiln.org's Flickr for lots more photos and Youtube for videos. There's also a Woodkiln.org Twitter and Tumblr.
Firing the Kiln
13th Firing of the Spring Valley Anagama
In Feb 2009 we did another smaller group firing, tumble stacking the front. We got lots of help from the lambs, sheep and goats also living on the property. We had a good time and we all learned a lot. The tumble stack tumbled and we ended up with a large one piece conglomeration of several large pots fused together. Very cool looking but not what we were after. We got some gorgeous pots with lots of yummy ash.
Below are some pictures from that firing, the full set can be seen in the 13th Firing Gallery on Flickr
11th Firing of the Spring Valley Anagama
In Feb of 2007 we fired the Spring Valley Anagama for the 11th time. We went back to our roots for this firing and decided to do a small group. We’d been doing large groups of 14+ people, with 3 people on a shift with lot of extra folks around. We love to share the beauty of the kiln firing, but with so many involved, people stop focusing on the kiln. So we went small to keep it more intimate, get in more pots per person.
So we took some chances:
--We tumble stacked the kiln for the first time. Oh how I’d been itching to do that!
--We used the setuma, a wall of brick in the back that is supposed to help retain heat and even out the firing. We only fired with it once before and it was time to try it again. I’m still not so sure it works as intended for our kiln. The back section at the exit flue acts like a setuma, so it’s like having 2 setumas. No matter what we do, it seems to draw really hard across the bottom at the back. The setuma made the kiln about 60 cu ft instead of 90, perfect for our smaller group.
--We eliminated one of the 2 pairs of side stoke holes. Instead, we set up the shelves so that when you open the back stoke door you can pull out a pot for a hikidashi, which involves pulling out a piece at cone 10 that has a special glaze.
--We did a reduction shut down at the end. That means making the ash matte (rather than clear)
--Shifts were different. Normally we have a shift lead working the front stoke and two side stokers. The front is on a six-hour shift and the side stokers are on alternating three-hour shifts. This time, it was two people per six-hour shift with a three-hour overlap, so someone changed off every three hours. Much more strenuous and demanding. Everyone had to work the front (and were qualified to do so).
Stacking went like this: Setuma 24” off the back wall, 36” x 24” shelf stack in the back. The back set of stoke ports were lined up with shelves for the hikidashi. Don’t know if we will do that again, needed to spend a lot of time on it. You can see the shelf height spacing in the unloading pictures. Next section was the back grate. Then we tumble stacked forward with big pots and vases with massive plates in between.
The firing was a day longer than normal for us so we could go slower through the early stages of the firing to build up more ash on the pots. We started with a small fire on the grate of the fire box. We skipped the under-the-grate thing this time, and stirred and shook up things every two hours or so. We were trying to create a snowstorm of ash in the kiln. I was looking for a really thick base layer of ash, about 1/2 inch on the shoulders of the pots. We did not get that much but we still got a lot. We did this for about a day, then started to move the temperature up towards our target of cone 9 (2300 F)
It was at red heat a day later around cone 08 (1200 F), a little fast for what we wanted. About 48 hours in to the firingvwe started stoking the back stoke doors to help balance out the temperature in the back, ideally getting to a bright white color emanating from the base of the chimney area.
Once we reached cone 9 in the front we started to cycle the kiln, putting it into reduction and dropping the temperature to about cone 6 (2200 F) and then back up to cone 9+ (2300+ F) in an oxidation environment to build up ash and then color. We did this for about 48 hours, reaching a max temperature of cone 12 (~2400 F) in the front. During the reduction cycles we had to watch the color to make sure the temperature does not drop and the color goes red. If it goes red you’d better start to change some of the settings or you are going to have a long night trying to get it white again. We don’t fire with a pyrometer so watching the color is critical.
Then it was time for the reduction shut down. A reduction shut down goes like this: open the damper, fill up front box with two to three wheelbarrows full of wood (if four will fit, use four) then seal it up tight. To fill it up with wood, we left the stoke door open and had 5 people taking turns in round robin at the door, stuffing wood in. Then we bricked up all the openings and sealed them with leftover wadding and clay. We watched the flames out the chimney and slowly closed the damper as the flames get smaller and smaller. Then the hard part, waiting for 5 days for the thing to cool down so we can see the pots! – I really like reduction shut down!
Below are some pictures from that firing, the full set can be seen in the 11th Firing Gallery on Flickr
Building the Spring Valley Anagama
Below are some pictures from the construction, the full set can be seen in the Construction Gallery on Flickr.